Why Create Linesheets in NuORDER?
Linesheet creation is a critical step for your Nordstom Buyer's pre-market preparation and your in-market appointment!
As a brand you will have a linesheet ready prior to your appointment with Nordstrom and it's important that we have this updated and live in NuORDER.
The way you present your product in NuORDER will directly impact the Nordstrom teams buying process. Buyers will be leveraging these linesheets to take notes in-market and ultimately plan their buys.
The NuORDER team is here to ensure that we create beautiful and compelling linesheets that reflect the way that you want to present your brand and products.
Simply provide us with copies of your existing linesheets or catalogs via Dropbox for us to recreate. Once you have access to your NuORDER portal, you can choose to manage this feature yourself or we can create these for you.
Below you'll find a quick HOW-TO should you decide to create these yourself.
How to Create Linesheets in NuORDER
There two ways to create linesheets in the NuORDER:
- In the product gallery
- In the "Linesheet" tab
Create Via Product Gallery
Step 1: When in the "Products" tab you can select one or more products using the check boxes in the upper left hand corner of each image. You can also use filters to set a specific season, category, division, etc.
Step 2: Click the "Select All" box if you'd like to add all items that meet your filters.
Step 3: Once selected, you will see the “Bulk Actions” toolbar appear at the top with and action bar on the right. Select “Add to Linesheet” from this menu.

Step 4: You will then be prompted to name your linesheet. You can also add the products to an existing linesheet from this dialog box.

Create via Linesheet Tab
From the linesheets tab in the navigation bar, you can add products to an existing linesheet or create a brand new linesheet using a button at the top right of the menu.
Step 1: Hover over the Linesheets Tab on the menu, and select “Create Linesheet.”
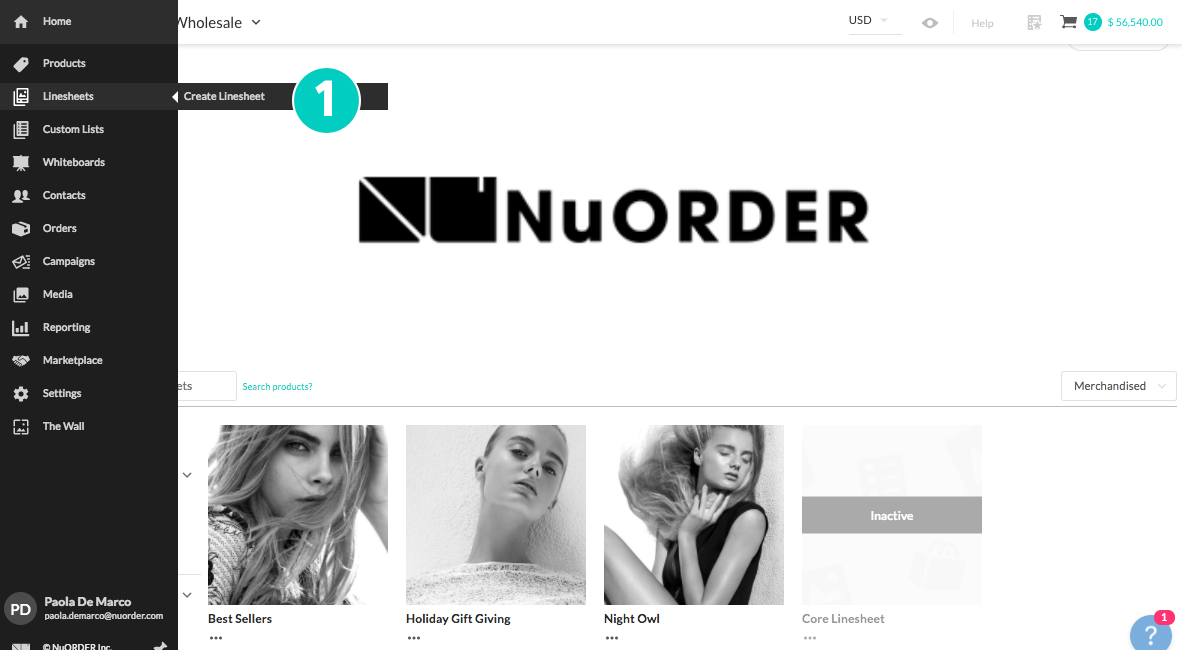
Step 2: You’ll be taken to a blank linesheet where the cursor will prompt you to enter a name for the linesheet (ie: Fall 2018, Core, Carry- Over, etc.).
Step 3: From there you can add a cover image, choose PDF settings from the linesheet's settings.
Step 4: Add Products - select the “Add Items” plus sign on the lower left hand corner.
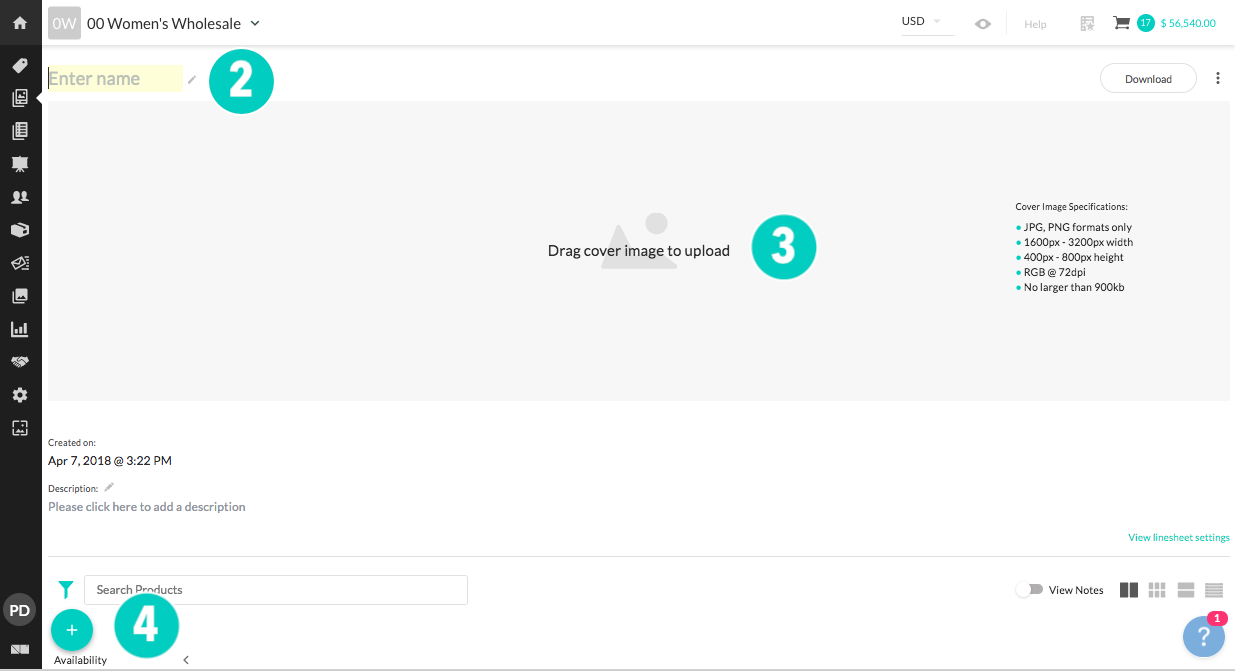
From the “Add Items” section..
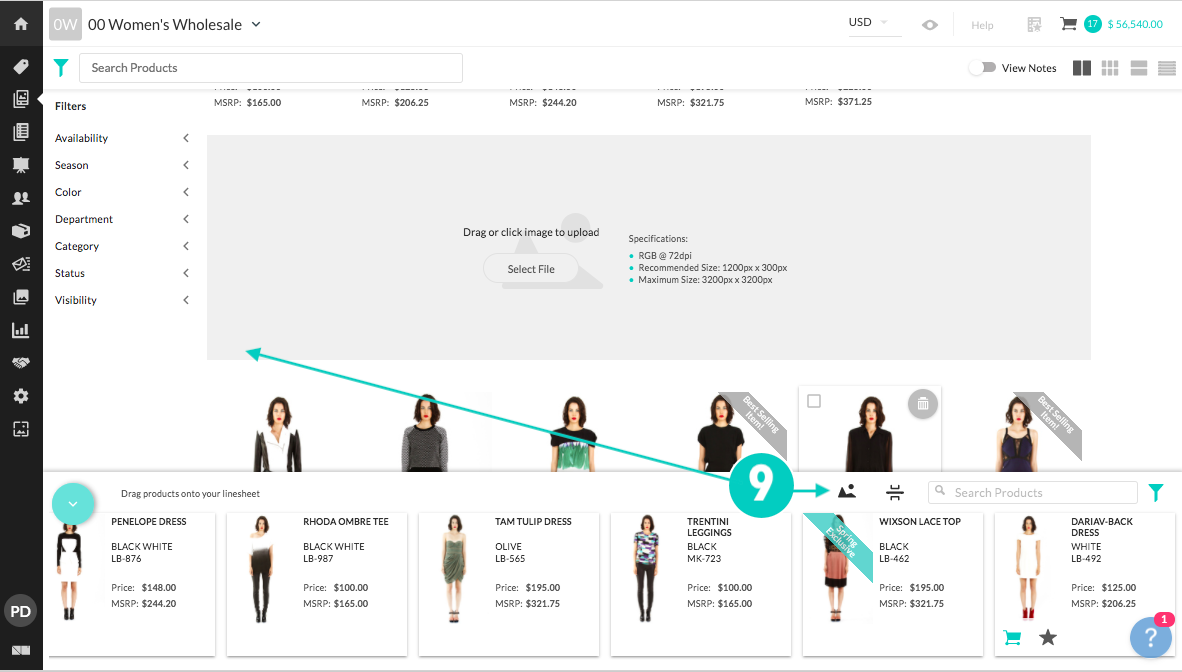
Step 5: Use the search bar, and filter icon (to the right of the search bar) to find the products you'd like to add to the linesheet.
Step 6: Select the box in the upper left hand corner of the product. You can then drag and drop the item into the linesheet. You can also multi-select.
Step 7: You can "Select All," and then click on the icon that allows you to "Add Selected to Bottom."

Step 8: To add line separators, drag and drop the icon in front of the product you'd like to separate.

Step 9: To add an image separator, select the icon and drag & drop it in front of the product you'd like to separate. The image will appear as full page in the pdf download.
Helpful Tips
- To edit your linesheet (merchandise products, remove items, etc.) - select the "Linesheet" tab from the navigation bar on the left of the screen and click into the linesheet you created
- Any changes made to your linesheet save in real time, no need to worry about losing progress!
- Don't forget to publish your linesheets! Click into your linesheet from the "Linesheet" tab in the navigation bar. Select "View Linesheet Settings" and set toggle to active
Contact nordstrom@nuorder.com if you need assistance.
Comments
0 comments
Please sign in to leave a comment.